1. 배치 관련 위젯
배치 관련 위젯은 하위 위젯을 가로 또는 세로로 배치하거나 위젯 위에 위젯을 겹칠 때 사용함!
1-1. `Row`위젯
`Row`는 `Column`위젯과 함께 가로*세로로 배치하는데 사용됨. `Row`는 말 그대로 가로로 위젯을 배치하는데 사용됨.
하나의 `child`위젯을 입력받는 위젯들과 다르게 여러 개의 `child`위젯을 입력받을 수 있는 `children`파라미터를 노출함.
`Row`와 `Column`에는 주축과 반대축이라는 개념이 존재하는데

- `Row`의 주축 : 가로, 반대축 : 세로
- `Column`의 주축 : 세로, 반대축 : 가로
위젯을 가로로 배치하는 `Row`위젯은 `crossAxisAlignment`파라미터를 사용함. 이전 템플릿 코드는 버리고 새로 작성해보겠음
void main() {
  runApp(RowWidgetExample());
}

// layout - Row
class RowWidgetExample extends StatelessWidget {
  @override
  Widget build(BuildContext context) {
    return MaterialApp(
      home: Scaffold(
        body: SizedBox(
          // 반대축에서 이동할 공간을 제공하기 위해 높이를 최대한으로 설정
          height: double.infinity,
          child: Row(

            // 주축 정렬 지정 -> 좌측부터 차곡차곡 위젯을 나열하겠다는 뜻
            mainAxisAlignment: MainAxisAlignment.start,
            // 반대축 정렬 지정 -> 각 Container들이 Row의 세로 높이 기준으로 중앙에 위치하게만든다는 뜻
            crossAxisAlignment: CrossAxisAlignment.center,

            // 넣고 싶은 위젯 입력
            children: [
              Container(
                height: 50.0,
                width: 50.0,
                color: Colors.red,
              ),

              // SizedBox는 일반적으로 공백을 생성할 때 사용
              const SizedBox(width: 12.0),
              Container(
                height: 50.0,
                width: 50.0,
                color: Colors.green,
              ),
              const SizedBox(width: 12.0),
              Container(
              height: 50.0,
              width: 50.0,
              color: Colors.blue,
              ),
            ],
          ),
        )
      )
    );
  }
}
위 코드의 핵심은
height: double.infinity,
child: Row(
  // 주축 정렬 지정 -> 좌측부터 차곡차곡 위젯을 나열하겠다는 뜻
  mainAxisAlignment: MainAxisAlignment.start,
  // 반대축 정렬 지정 -> 각 Container들이 Row의 세로 높이 기준으로 중앙에 위치하게만든다는 뜻
  crossAxisAlignment: CrossAxisAlignment.center,

  // 넣고 싶은 위젯 입력
  children: [
    Container(
      height: 50.0,
      width: 50.0,
      color: Colors.red,
    ),

    // SizedBox는 일반적으로 공백을 생성할 때 사용
    const SizedBox(width: 12.0),
    Container(
      height: 50.0,
      width: 50.0,
      color: Colors.green,
    ),
이부분임!
우선 반대축에서 이동할 공간을 확보하기 위해 높이를 최대한으로 설정했음. -> `height: double.infinity`
`Row`로 하겠다고 선언을 하고 주축과 반대축 정렬을 지정했음. 그 다음 넣고싶은 위젯에서 첫 번째는 `Container`로 바로 입력을 했는데 그 다음은 공백을 만들기 위해서 `const SizedBox(width: 12.0)`을 넣어 가로로 12픽셀만큼 떨어뜨린다는 의미임!

1-2. `Column`위젯
`Row`의 주축과 반대축이 서로 반대된다는 생각만 하면됨
void main() {
  runApp(ColumnWidgetExample());
}

// layout - Row
class ColumnWidgetExample extends StatelessWidget {
  @override
  Widget build(BuildContext context) {
    return MaterialApp(
        home: Scaffold(
            body: SizedBox(
              // 반대축에서 이동할 공간을 제공하기 위해 높이를 최대한으로 설정
              width: double.infinity,
              child: Column(
                // 주축 정렬 지정 ->
                mainAxisAlignment: MainAxisAlignment.start,
                // 반대축 정렬 지정
                crossAxisAlignment: CrossAxisAlignment.center,

                // 넣고 싶은 위젯 입력
                children: [
                  Container(
                    height: 50.0,
                    width: 50.0,
                    color: Colors.red,
                  ),

                  // SizedBox는 일반적으로 공백을 생성할 때 사용
                  const SizedBox(height: 12.0),
                  Container(
                    height: 50.0,
                    width: 50.0,
                    color: Colors.green,
                  ),
                  const SizedBox(height: 12.0),
                  Container(
                    height: 50.0,
                    width: 50.0,
                    color: Colors.blue,
                  ),
                ],
              ),
            ),
        ),
    );
  }
}
위 Row와 동일하게 핵심으로 봐야할 부분은
width: double.infinity,
child: Column(
  // 주축 정렬 지정 ->
  mainAxisAlignment: MainAxisAlignment.start,
  // 반대축 정렬 지정
  crossAxisAlignment: CrossAxisAlignment.center,

  // 넣고 싶은 위젯 입력
  children: [
    Container(
      height: 50.0,
      width: 50.0,
      color: Colors.red,
    ),

    // SizedBox는 일반적으로 공백을 생성할 때 사용
    const SizedBox(height: 12.0),
    Container(
      height: 50.0,
      width: 50.0,
      color: Colors.green,
    ),
    const SizedBox(height: 12.0),
    Container(
      height: 50.0,
      width: 50.0,
      color: Colors.blue,
    ),
  ],
),
여기임 `Row`랑 반대로 생각하면 됨.
우선 반대축에서 이동할 공간을 확보하기 위해 너비를 최대한으로 설정했음. -> `width: double.infinity`
`Column`으로 하겠다고 선언을 하고 주축과 반대축 정렬을 지정했음. 그 다음 넣고싶은 위젯에서 첫 번째는 `Container`로 바로 입력을 했는데 그 다음은 공백을 만들기 위해서 `const SizedBox(height: 12.0)`을 넣어 세로로 12픽셀만큼 떨어뜨린다는 의미임!

1-3. `Flexible`위젯
`Flexible`위젯은 `Row`나 `Column`에서 사용되는 위젯임. 이 두곳에서 사용하면 `Flexible`에 제공된 `child`크기가 최소한으로 차지하게 할 수 있음.
추가로, `flex`파라미터를 이용해 각 `Flexible`위젯이 얼만큼의 비율로 공간을 차지할지 지정할 수도 있음.
// layout - Flexible
void main() {
  runApp(FlexibleWidgetExample());
}

class FlexibleWidgetExample extends StatelessWidget {
  @override
  Widget build(BuildContext context) {
    return MaterialApp(
      home: Scaffold(
        body: SizedBox(
          // 반대축에서 이동할 공간을 제공하기 위해 높이를 최대한으로 설정
          width: double.infinity,
          child: Column(
            children: [
              Flexible(
                // flex는 남은 공간을 차지할 비율을 의미. flex값을 제공하지 않으면 기본값은 1
                flex: 1,

                child: Container(
                  color: Colors.blue,
                ),
              ),
              Flexible(
                flex: 1,

                child: Container(
                  color: Colors.red,
                ),
              ),
            ],
          )
        ),
      ),
    );
  }
}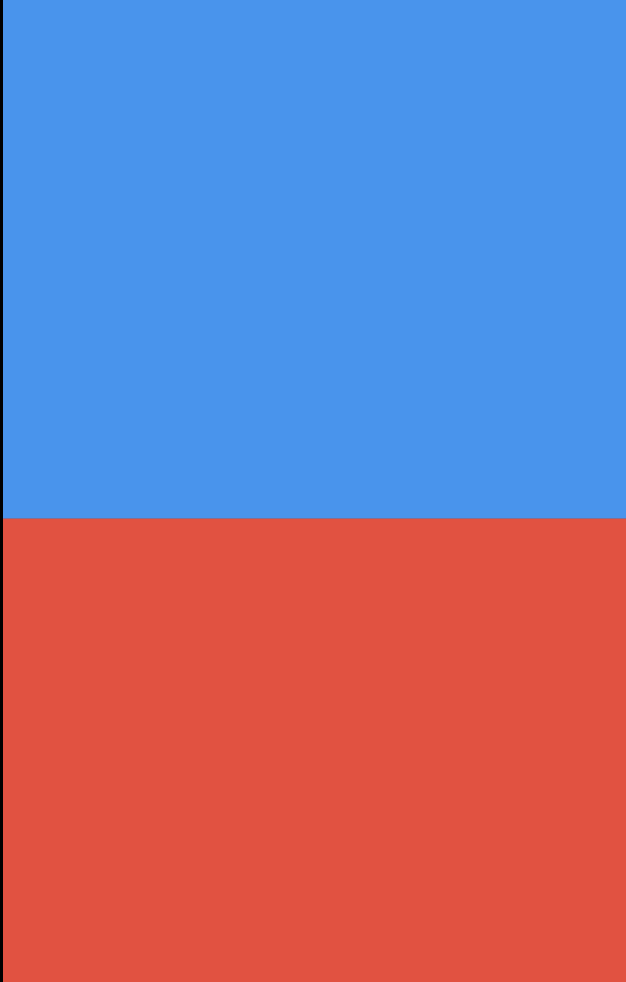
1-3. `Expanded`위젯
`Expanded`위젯은 `Flexible`위젯을 상속하는 위젯임. `Column`과 `Row`에서 사용하면 위젯이 남아있는 공간을 최대한으로 차지함.
// layout - Expanded
void main() {
  runApp(ExpandedWidgetExample());
}

class ExpandedWidgetExample extends StatelessWidget {
  @override
  Widget build(BuildContext context) {
    return MaterialApp(
      home: Scaffold(
        body: SizedBox(
          // 반대축에서 이동할 공간을 제공하기 위해 높이를 최대한으로 설정
            width: double.infinity,
            child: Column(
              children: [
                Expanded(
                  child: Container(
                    color: Colors.blue,
                  ),
                ),

                Expanded(
                  child: Container(
                    color: Colors.red,
                  ),
                ),
              ],
            )
        ),
      ),
    );
  }
}
`Expanded`위젯이 두 개이기 때문에 각 위젯이 남는 공간을 똑같이 나눠서 차지함. 이 비율은 `Flexible`과 마찬가지로 `flex`매개변수의 값에 따라 변경됨.
1-5. `Stack`위젯
`Row`와 `Column`은 각각 가로와 세로로 위젯을 배치하는 역할을 하지만,
`Stack`은 위젯을 겹치는 기능을 제공함. 단, 두께감을 표시하지는 못함.
// layout - Stack
void main() {
  runApp(StackWidgetExample());
}

class StackWidgetExample extends StatelessWidget {
  @override
  Widget build(BuildContext context) {
    return MaterialApp(
      home: Scaffold(
        body: SizedBox(
          // 반대축에서 이동할 공간을 제공하기 위해 높이를 최대한으로 설정
            width: double.infinity,
            child: Stack(
              children: [
                Container(
                  height: 300.0,
                  width: 300.0,
                  color: Colors.red,
                ),
                Container(
                  height: 250.0,
                  width: 250.0,
                  color: Colors.yellow,
                ),
                Container(
                  height: 200.0,
                  width: 200.0,
                  color: Colors.blue,
                ),
              ],
            ),
        ),
      ),
    );
  }
}
https://github.com/Leedoseo/Flutter_WidgetStudy
GitHub - Leedoseo/Flutter_WidgetStudy
Contribute to Leedoseo/Flutter_WidgetStudy development by creating an account on GitHub.
github.com
출처 : 코드팩토리의 플러터 프로그래밍
'Flutter > Flutter Study' 카테고리의 다른 글
| [Flutter] 웹뷰 사용해서 앱에서 웹연결 실습 간단 정리 (0) | 2025.04.17 |
|---|---|
| [Flutter] Basic Widget 기본 개념 (실습) (0) | 2025.04.15 |
| [Flutter] Basic Widget 기본 개념 (디자인) (0) | 2025.04.15 |
| [Flutter] Basic Widget 기본 개념 (텍스트와 제스처) (0) | 2025.04.14 |
| [Flutter] Basic Widget 기본 개념 (Child와 Children) (1) | 2025.04.14 |